 English
  Magyar


SSH tunnelling is an alternative method of using TorVPN. It is not a VPN.
It is secure and doesn't need administrator privileges, but it does not redirect all of your traffic automatically as OpenVPN does.
After you have set up the SSH tunnel, you need to configure your browser (or other software) to make use of the tunnel created with it.
SSH tunnelling on Windows using PuTTY
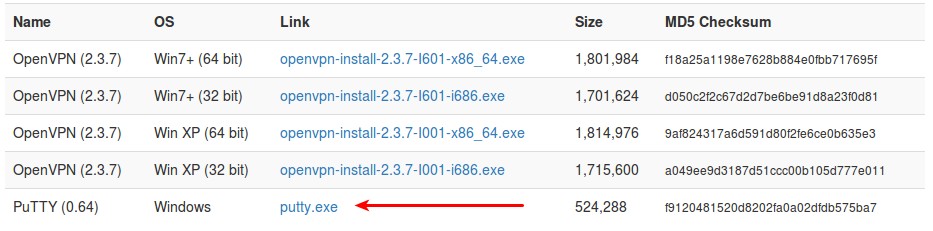
(1) Download PuTTY
You can download PuTTY from our website, but you can also download it from the official website.
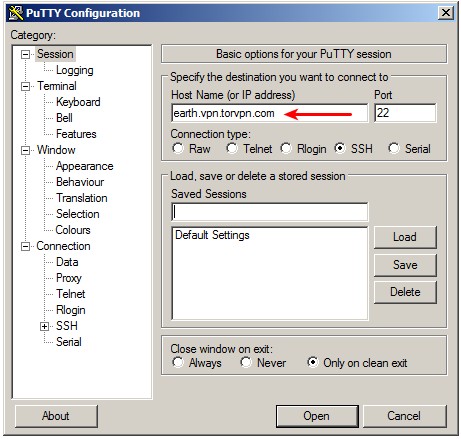
(2) Run PuTTY
PuTTY does not need to be installed. Simply run it. The first step is to enter the hostname of the server you want to connect to.
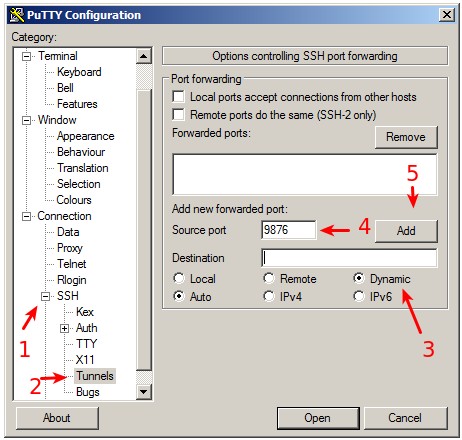
(3) Set up a dynamic tunnel
In the left menu, expand the 'SSH' option and click 'Tunnels'. Enter any unused port number, choose 'Dynamic' as type, then click the 'Add' button.
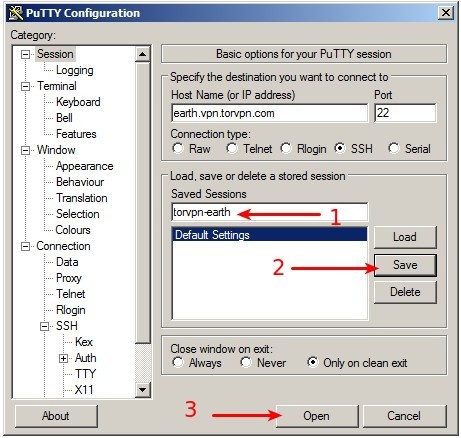
(4) Save & connect
Go back to the original screen by clicking 'Session' at the top of the left menu. Enter any name you like under 'Saved Sessions' and click 'Save' so next time you can simply double click instead of having to repeat the process. Click 'Open' to connect to the server.
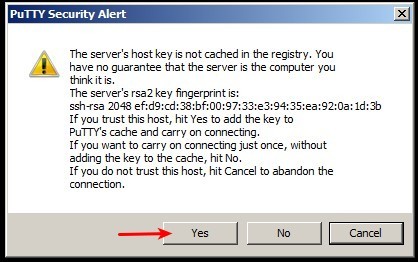
(5) Accept the server key
The first time you connect to a server, it will ask if you accept the server key. Compare the fingerprint shown in that window with the fingerprint in the modal window when you click on a server account on the control panel. Click 'Yes' if you are satisfied that the fingerprint is correct.
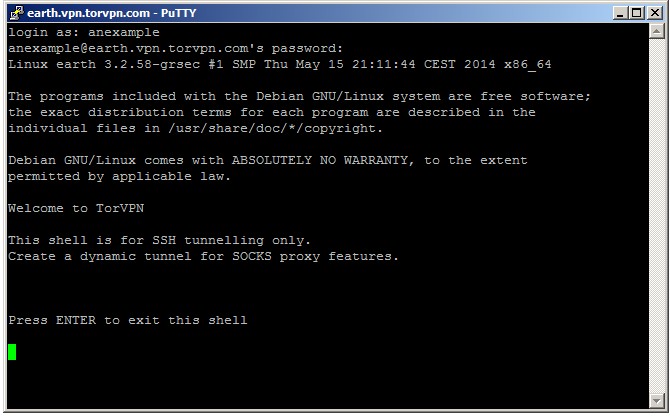
(6) Authenticate
The server will ask for your service username and password. You can find these on your TorVPN control panel. The username should be all lowercase. The password is NOT your main account password, but the password for the specific service account. You will not see the password as you type it in. It's normal.
(7) Configure the browser to use the SSH tunnel
Configure your browser to use the proxy to access the internet. The dynamic SSH tunnel you created is essentially a SOCKS proxy encrypted by the SSH protocol. Choose the SOCKS proxy type. For hostname, enter localhost, for port number, enter the same number as before (in this example, 9876).

SSH tunnelling on Linux
Run SSH in the terminal
The process is the same as under Windows, except you do not need PuTTY. SSH is likely installed on your system already. If SSH is not present on your system, use your favourite package manager to install it. Run SSH as such:
ssh -D9876 anexample@earth.vpn.torvpn.com